


We were just approved for a building permit to finish off our basement. When done, we’ll have a rec room, another bathroom and another (rather large) bedroom down there, which will be useful for guests.
Here it is in its current, unfinished state:
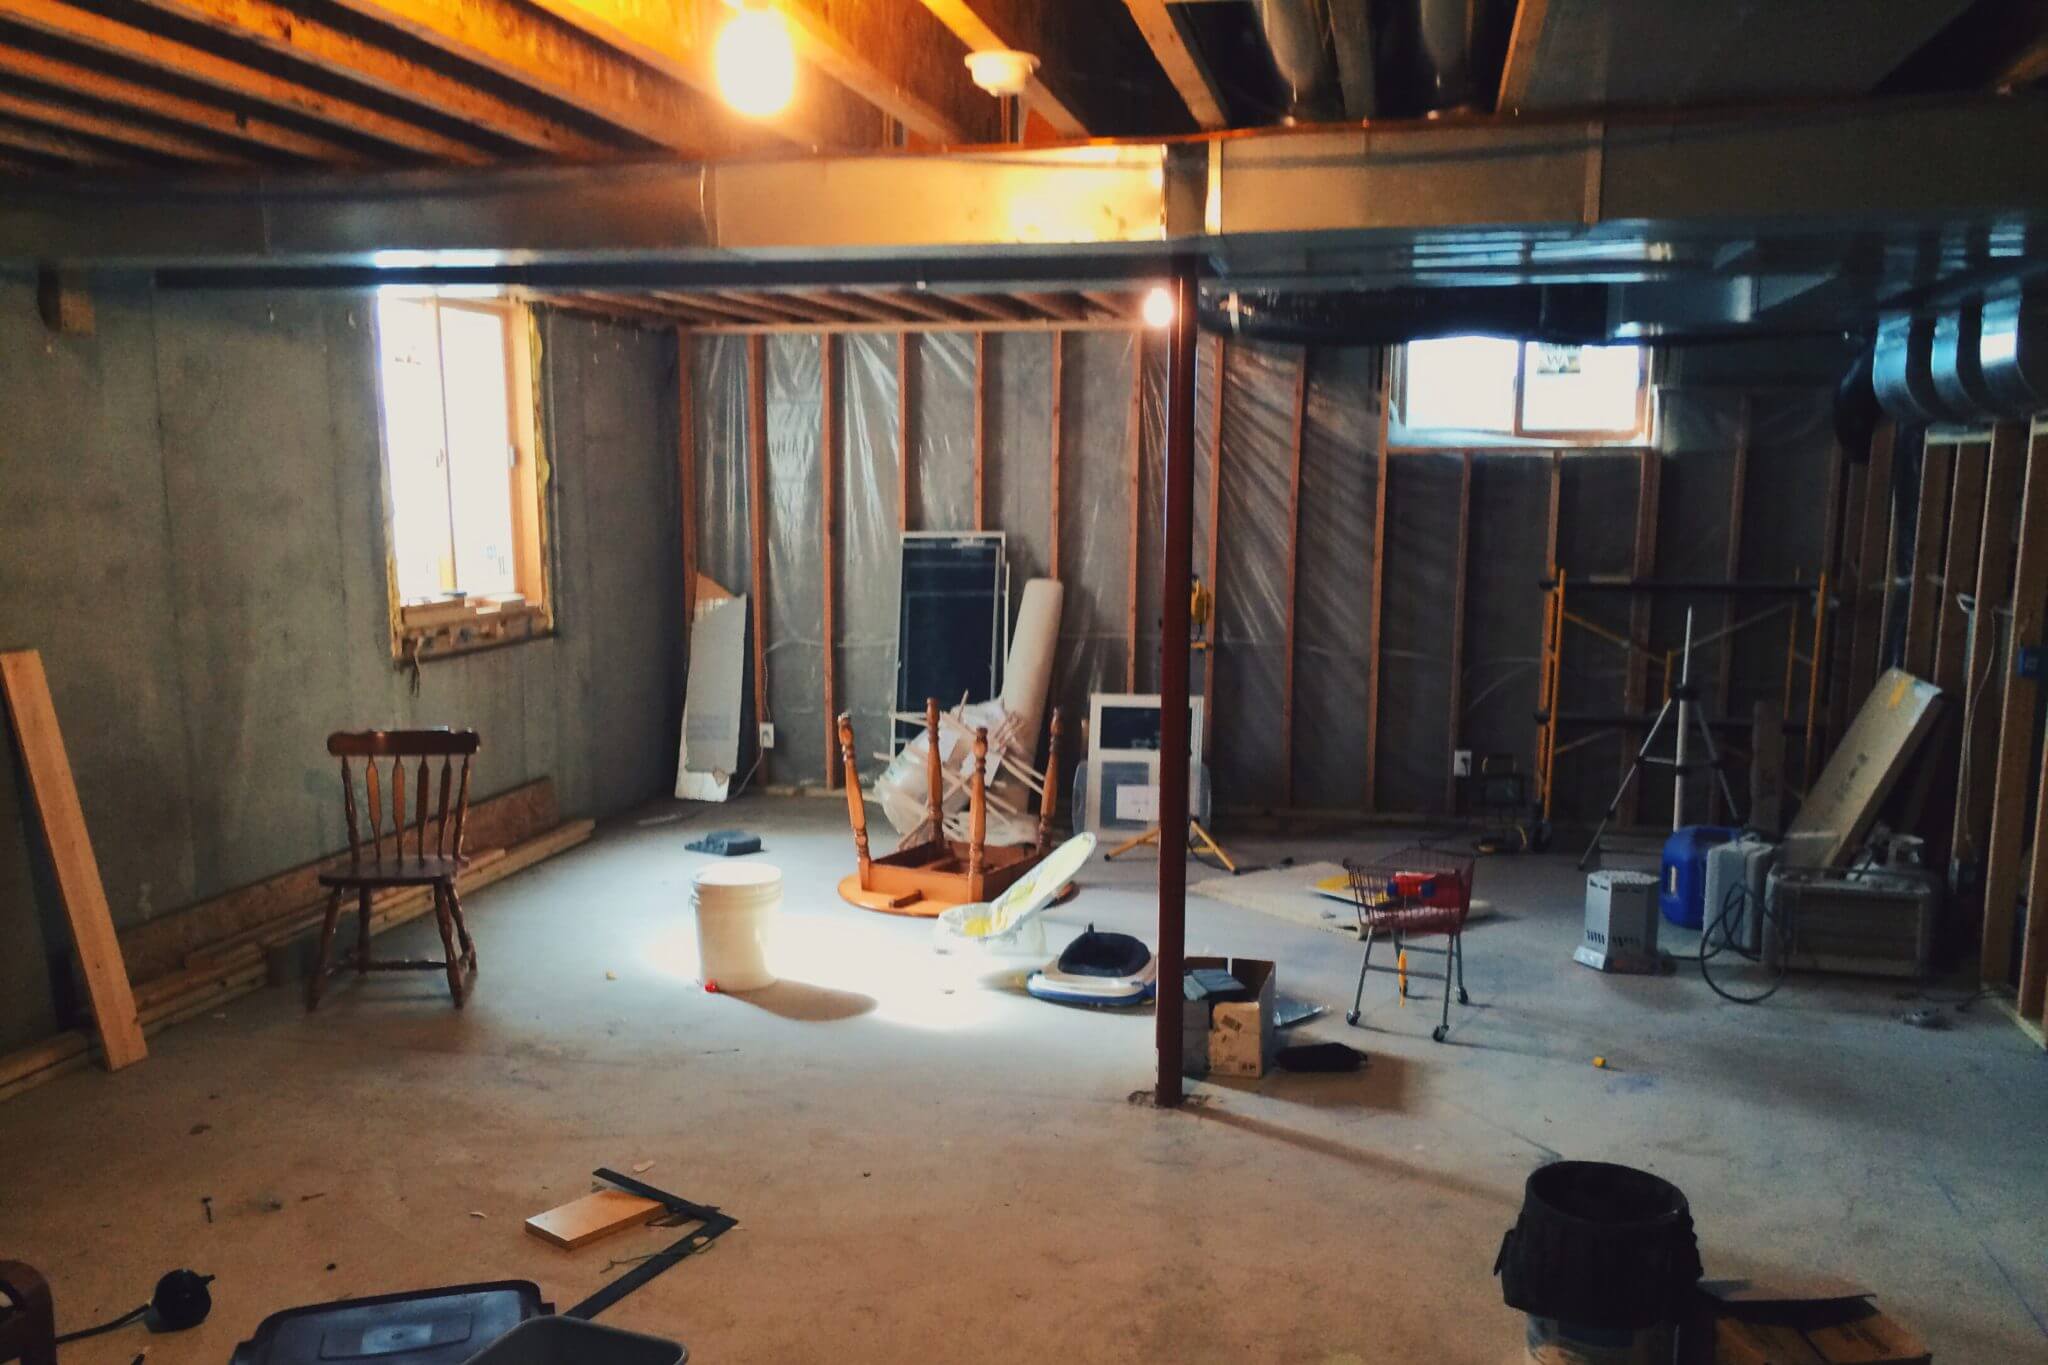
This is some poor photography but it allows you to see a few of the project’s distinguishing features.
- The ducts for the forced air heating/cooling system had to run underneath the first floor system. This means I’ll need to build soffits around them, lowering the ceiling under those ducts. In addition, though, a couple of my walls are located under those ducts, which means I won’t be able to fasten the tops of those walls to the joists. I’ll have to find some other way to brace those walls so that they don’t wobble at the top, which might be tricky because they’re also the shortest walls and they don’t have much to grab onto to begin with.
- You can see that I had put a plastic vapour barrier behind the outside wall framing, but I won’t be doing that for the rest of the outside walls, because there’s no legal requirement (and really no need) for it. The foundation walls are 8″ poured concrete, with a moisture barrier on the outside. If the foundation walls had been cement block, which is hollow and quite porous, I’d have been required to put plastic between the foundation and the wood walls to protect them from any water that might weep through from the outside.
- I’m also not planning to put any insulation on the outside walls. This tends to raise some eyebrows. The foundation walls also have a small amount of insulation (R–5) on the outside, which, combined with the R–40+ insulation in the attic, gives me all the insulation I need (again both legally and practically). Furthermore, if I were to add insulation to the inside, I’d be effectively preventing the house’s warmth from penetrating the concrete wall, making the wall itself colder.
We’re hoping to have most of this project (except for the bathroom) complete by Christmas time so visiting kin can make use of it. That might be tough with the baby due in a month but we have a shot at it.
Well, we definitely did not finish by Christmas. We had a baby in November, which pretty much derailed every other aspect of life. I thought that maybe since this was our second I’d be more practiced at balancing dad duties with other duties, but I failed to account for the possibility that the crying and sleeping schedules of my two children might end up completely out of phase.
We did make some progress since the first post, though. My goal was to be done with the framing by 2016, and I made the goal with about nine hours to spare.
Framing a basement is tedious business, especially when working alone. In general, first I had to build soffits around all the ducts in the ceiling, then I could build my walls around the soffits. But sometimes I’d have to build a particular wall before I could build a nearby soffit, and vice versa. It’s like building a three-dimensional puzzle — one in which all the pieces start out invisible.
The thing I dislike the most about framing in basements is the problem of fastening the bottom plate of each wall to the concrete floor. I’m convinced the universe notices when you’re attempting to do this and makes sure no single method will continue to work longer than an hour or two. I have a Ramset gun that fires fasteners into the concrete with .22 caliber gunpowder charges. This worked well for the first four walls, until the fasteners began bending and blowing out patches of concrete. Finally I bought some 2.5″ Tapcon screws and a set of concrete bits, and stole—er, borrowed my Dad’s hammer drill, and from then on I had to pre-drill the concrete in every place where I’d need to fasten a wall plate.
There are a lot of little blocks and cross-pieces that need to be installed, and most of them had to be pre-drilled and fastened with screws to avoid splitting the ends.
This was the year I finally bothered to learn the proper way to frame the corner on an angled wall. I wish I’d known this when I framed the rest of the house — the second floor in particular has several of these corners.
On the recommendation of neighbors, I hired Huber Plumbing to do the rough plumbing in the 3/4 bath, the ducting for the exhaust fan, and the forced-air supplies/returns for the rec room and bedroom. The drainage piping for this bathroom had already been laid back before we poured the foundation in 2008, otherwise I doubt I’d even be attempting to put a bathroom in down here. These guys finished up in a day and a half, scheduled and passed their inspections.
This photo shows just about all the waste from the project so far (except for a couple gallons of sawdust I’d already vacuumed up). You will typically hear that you should add 10% to a materials order to account for waste, but on a framing project this small I thought I ought to be able to get closer than that. So I just tried to estimate the actual material needed. It wouldn’t get me LEED-certified or anything, but for I thought I did pretty well. The remaining long pieces are very crooked and bowed (typical Menards; you get what you pay for). I highly recommend the use of a leaf bag for tossing small waste as you go: it stands up on its own and takes up less space than a garbage bin.
Next steps will be to do the electrical work and inspection, the rough framing inspection, sound-proofing, and drywall.
— Joel (Author) ·